How to configure a video digitizer
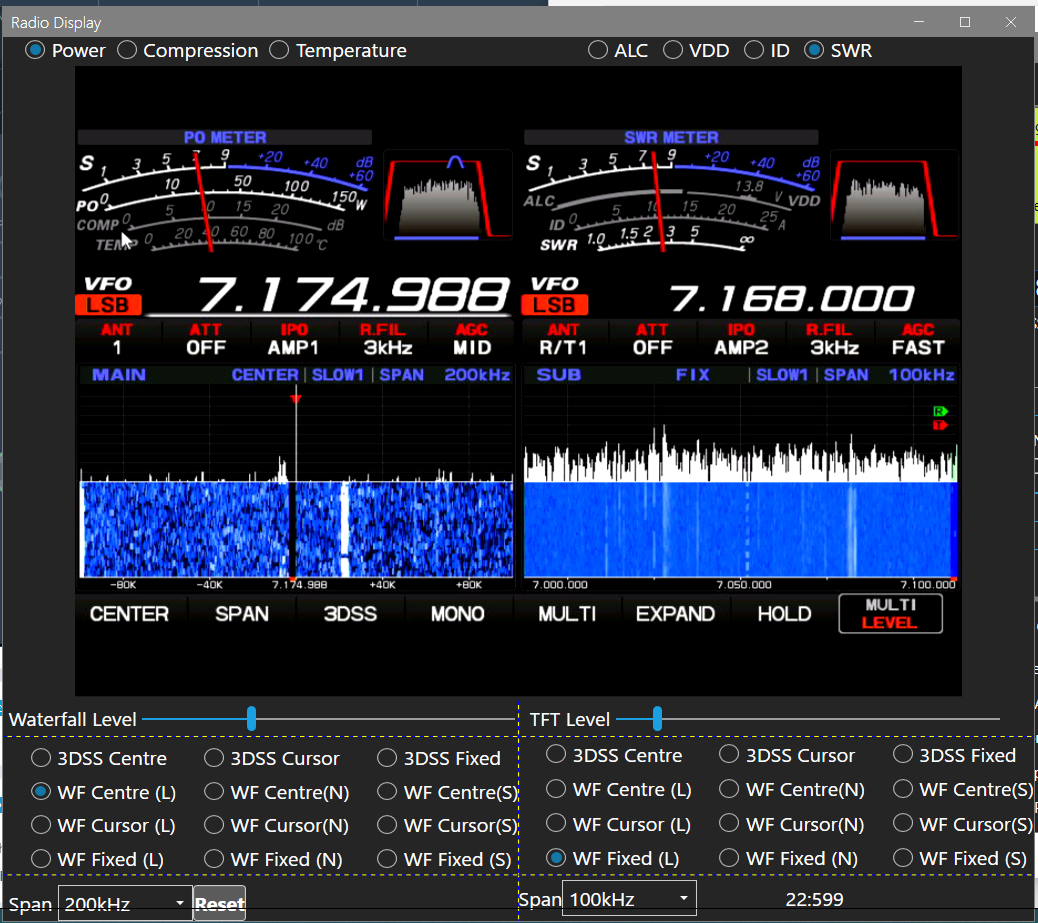
A common requirement of 101Cats users is to configure it to show the radio's display screen in a moveable and resizable window on the PC screen. The radio outputs the image of the display through the DVI port on the back and this can be connected to a dedicated monitor, but this can be an expensive option and uses up valuable desk space. The addition of a cheap video digitizer and 101Cats allows you to capture and route the screen display to a separate window on your PC screen.
Components required
In order to configure the screen within a window, you will need a suitable video digitizer and a cable to connect it to your radio. The device that most users have deployed is the Papeaso video capture card :
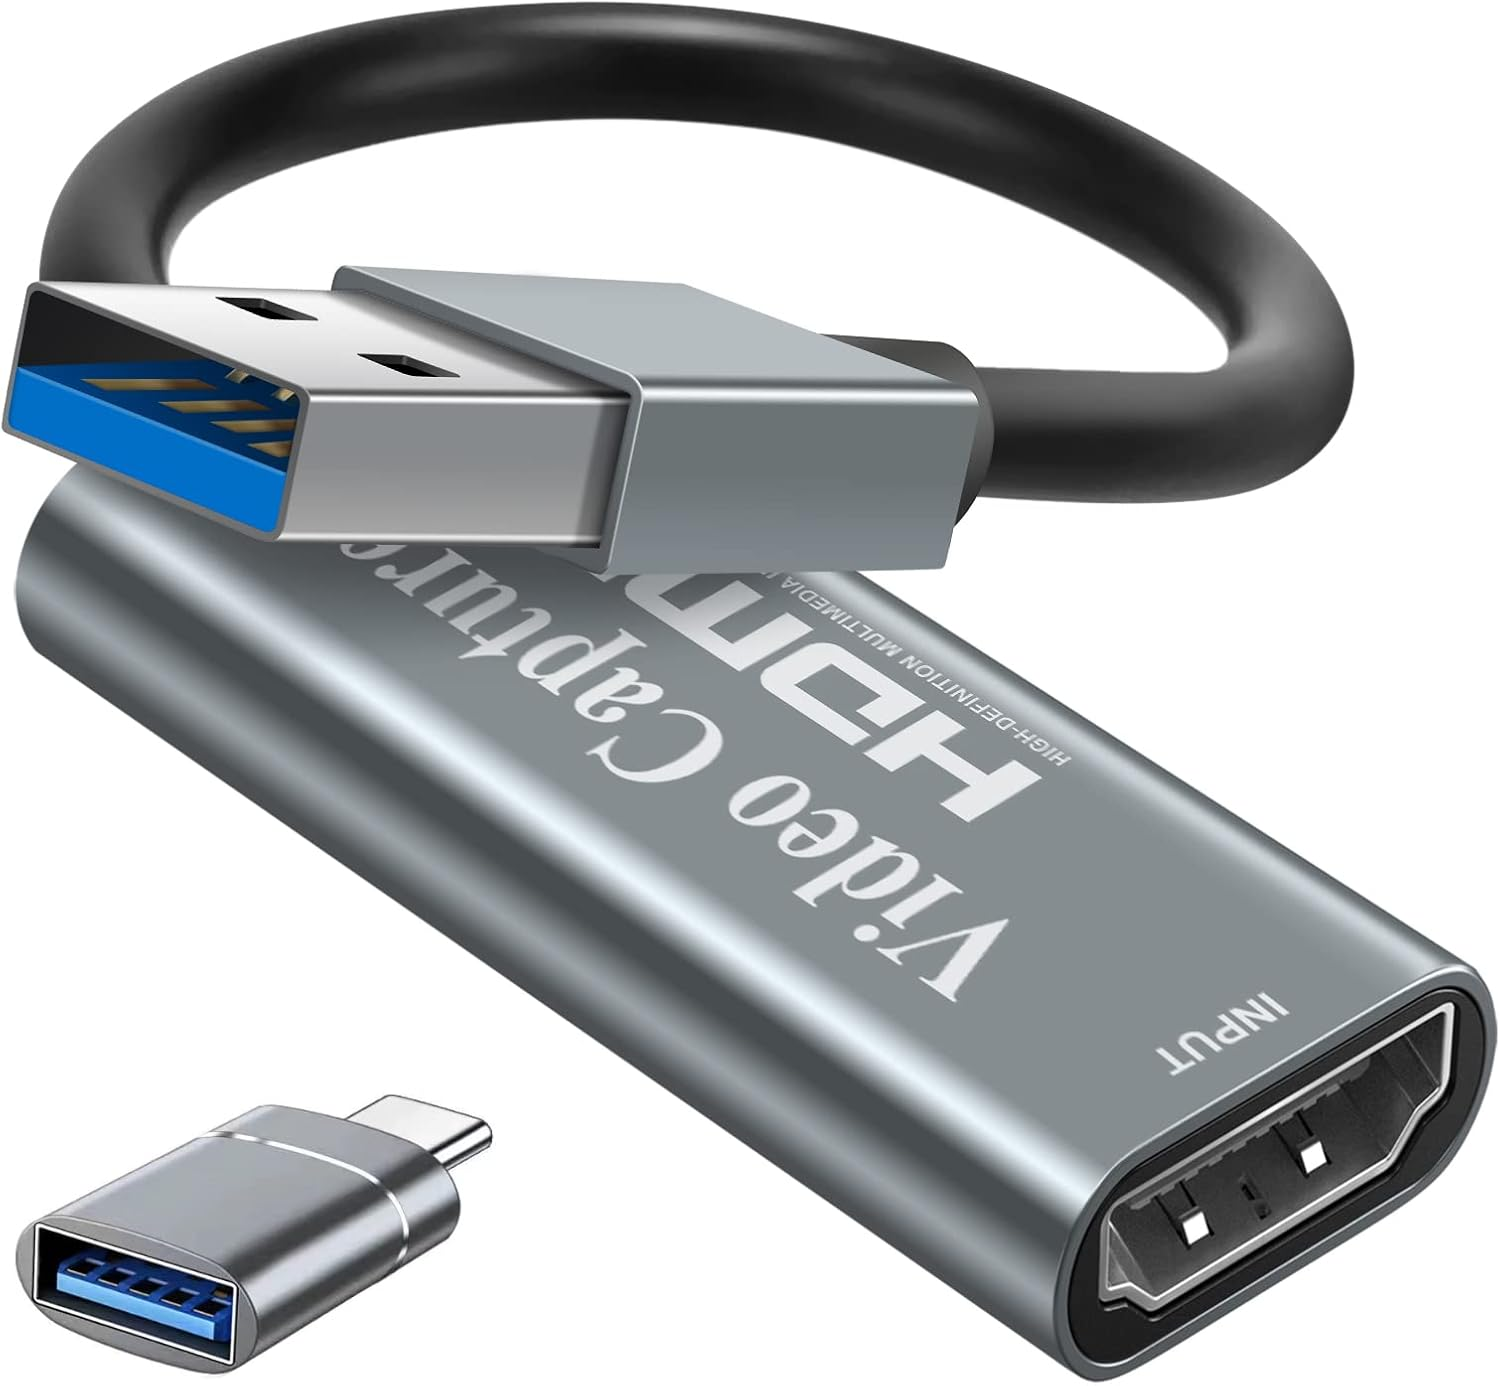
You can obtain this device from Amazon for less than $20 - see this link. That is a link to the U.S. Amazon site, but the same device is available at a comparable price from most other Amazon sites.
There are many other video digitizers available - hard-core gamers use them to capture and broadcast their game play as video streams. Many of these are far more expensive and have higher specifications than the Papeaso. There have been reports from some FTdx101 users that some of these high specification devices are not compatible with the video output of the radio. If you are buying a device specifically to capture the video output of the radio, I recommend sticking to the Papeaso or something very similar.
You will also need a cable to connect the digitizer to the port on the back of the radio. If you have bought the recommended Papeaso device, then you are going to need an HDMI to DVI cable. An Amazon Basics cable like this will do the job well. There is no merit in a more expensive cable. Don't buy longer than you actually need to get between the radio and your PC - the extra length may increase the risk of RFI from the radio disrupting the video stream.
You will need to plug the digitizer into a USB socket on your PC. The data rate is not very high and you can probably get away with a USB2 socket, but if you do connect to one, avoid using any kind of USB hub which will share the bandwidth of the socket with other devices. I like to connect the digitizer directly to a USB3 socket in order to minimise the risk of stuttering video.
Setting it up
The following applies to the Papeaso device; other devices will follow a similar path.
Start by following the installation instructions for the video digitizer hardware. Check if it is necessary to install device drivers before plugging it in for the first time - failure to do this correctly can result in configuration errors that are difficult to correct.
Once any necessary device drivers have been installed, plug the video digitiser into a free USB socket and connect its input to the video output of the radio with the cable you purchased. If all goes well, you should find that you have gained an additional "camera" in the Windows Device Manager:
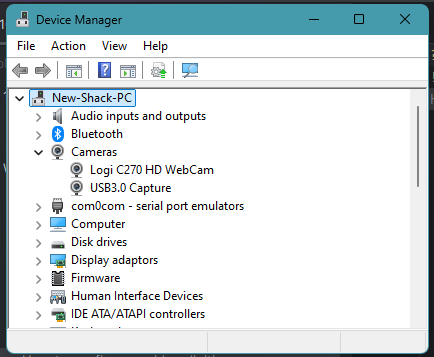
If you can't see a new device with a name of the form USB3.0 Capture there, there is no point in proceeding - review the installation process thus far and seek further advice.
Assuming that you can see the new device in Device Manager, then it is time to check the configuration of the radio. Hit the "FUNC" button on the front panel and select the "DISPLAY SETTING" button on the screen:
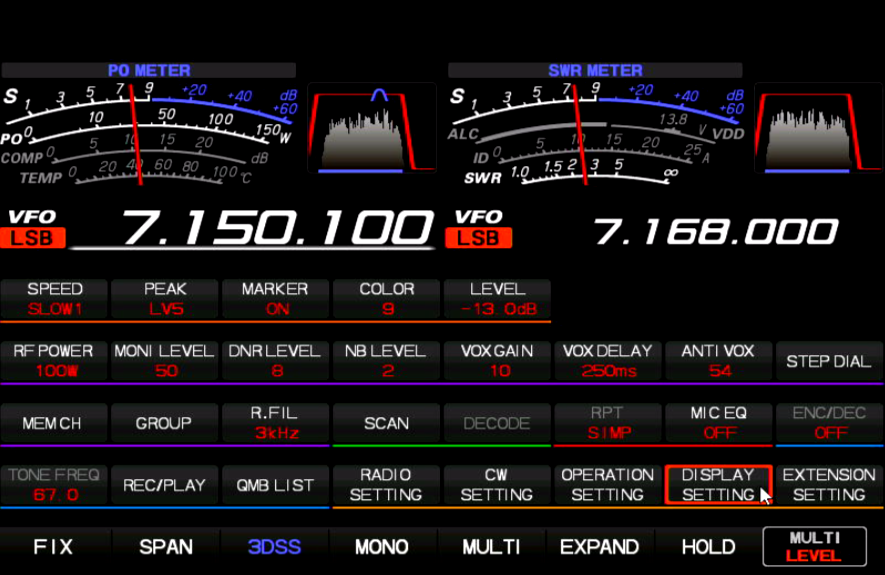
This will bring up the DISPLAY SETTING screen on the radio:
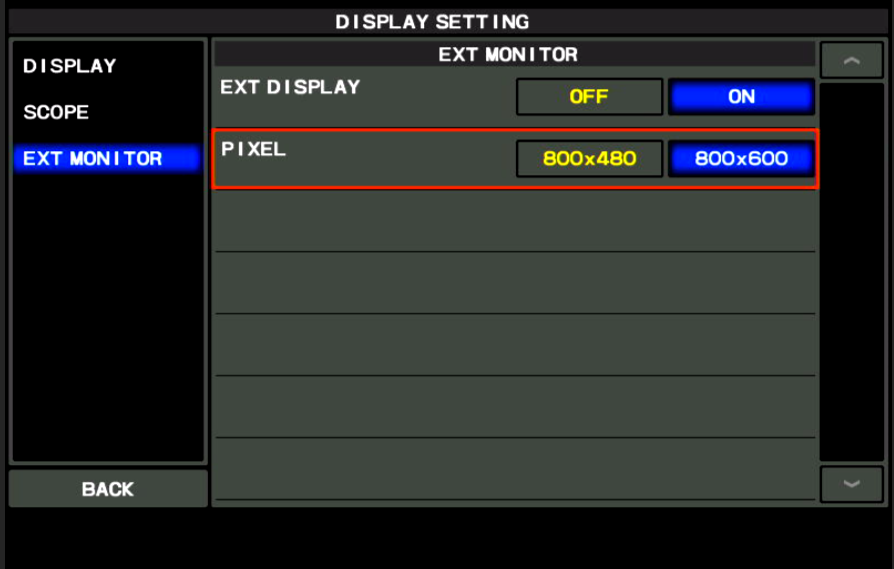
Select the EXT MONITOR tab and check that the EXT DISPLAY is turned on and the resolution is set to 800x600.
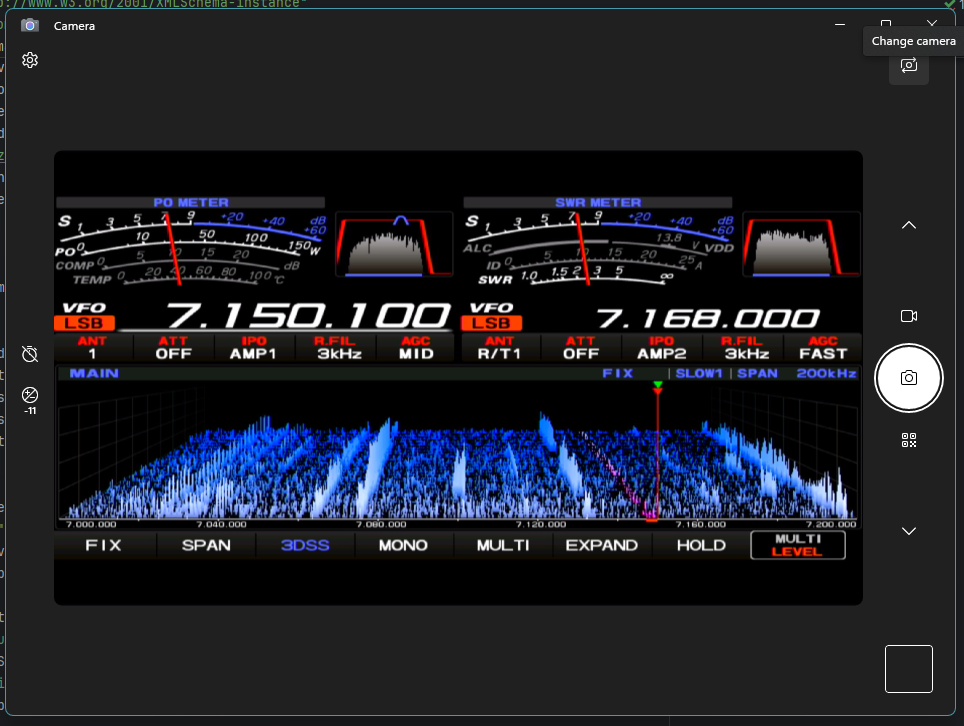
Although it is not essential, it is worth carrying out a quick check that everything is working properly bu running the "Camera" application on the PC. If the PC has a webcam fitted, you will probably find yourself gazing at your own handsome face - if so, click the "Change camera" button in the top right of the window and you should see the screen of the FTdx101 in glorious technicolour!
The final step is to configure 101Cats to show it - click the word "Configure" towards the right hand end of the window title bar and the Configuration Dialogue Box should be displayed:
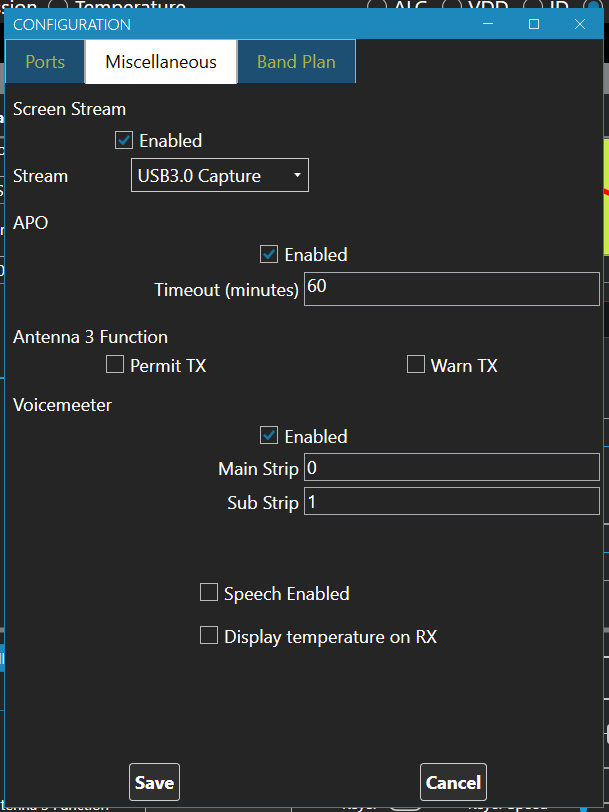
Select the newly installed "camera" in the Stream combo-box and enable the screen stream. Restart 101Cats (always necessary after changing the configuration). Click the "Spectrum" button near the bottom of the column of buttons on the right hand side of the main window and you should see:
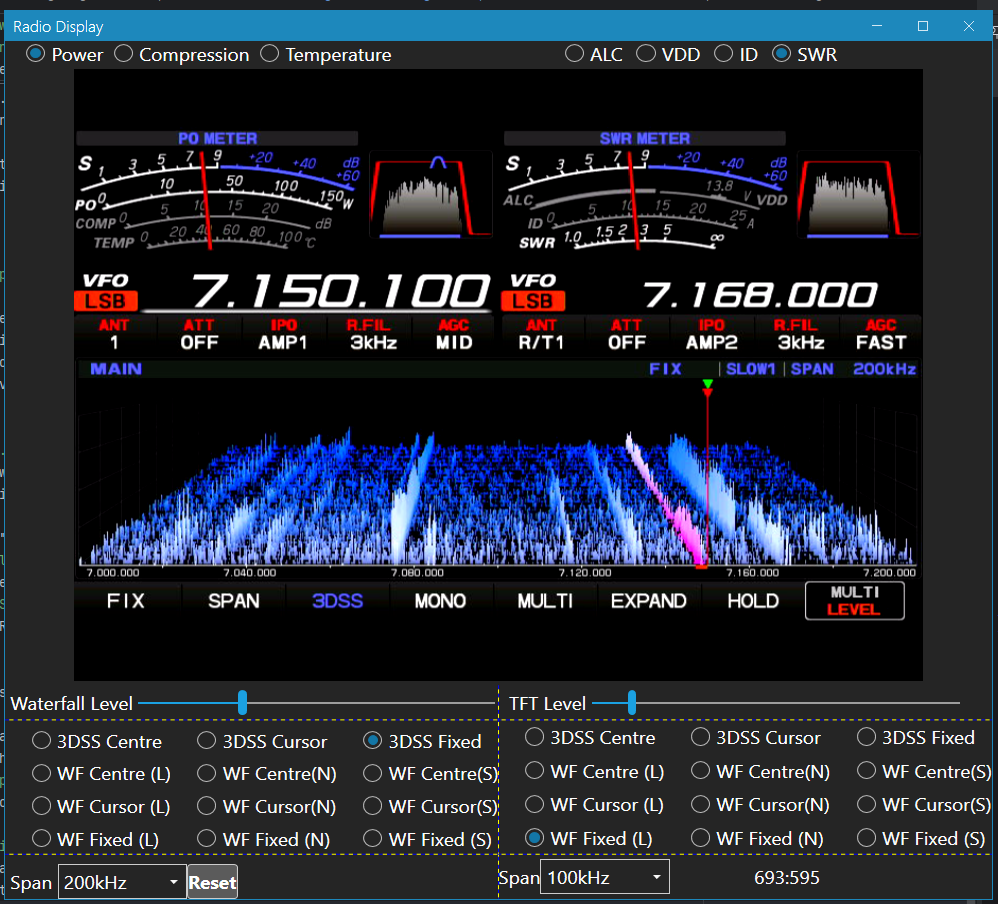
The Radio Buttons along the top of the window select the metric that each meter will display. The controls at the bottom should be fairly self-explanatory. If the mouse is hovering over this window and you rotate the mouse wheel, then you will tune the receiver. Clicking in the waterfall or spectrum display will tune to the frequency you are pointing to. Note that tuning by clicking in the spectrum display is only supported with the spectrum of a single receiver displayed. If you display the waterfalls for both main and sub like this, 101Cats is unable to tune by clicking.
